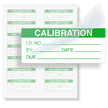
Preparation Helps Insure that your Calibration Labels Stick Well.
 Clean the Surface!

The surface for your label must be both clean and dry. We always alert our customers that trying to stick a label onto a dirty surface is just like trying to paint an old gutter. In both cases, your work is hardly permanent. Scrapping and cleaning are important. Make sure that you remove any grease or oils on the surface.
Sticking an asset tag onto a poorly prepared surface is like trying to paint a dirty gutter the asset tag is just not going to stay stuck for very long. Remember how important all the scrapping was when you repainted your house! Similarly, we recommend using a cleaning solution.
 Rough up the Surface
 [Slightly].
This may not be possible. But, if so, try a 3M Scotchbrite pad. A rougher surface gives more "tooth" and more "nooks and crannies " for the adhesive for bonding.
 Choose a Permanent or Removable Adhesive.
Determine if you want a label that can be removed after use or one that has a permanent adhesive. A permanent adhesive, of course, is more durable and is a better choice for instruments that often moved and subject to water, weather, abrasion, etc. We also offer various adhesive removers to help cleanly and easily strip off adhesive residue. Removable adhesives, however, are very popular and ideal for many instruments. Although, they are generally cleanly removable cleanly, please test the label on the application.
 Don't Apply Below Freezing.
The temperature must be above 40F for good adhesion. If, however, you have a special "cold temperature" application, please call. We will provide a special "freezer grade" adhesive.
 Have Patience.
Our calibration label adhesives can take up to 72 hours for full cure. Customers have found that a calibration label that may be removable cleanly after just 30 minutes, can become nearly impossible to remove, in tact, after a day.
 Tidy Pen for Clean Up.

This handy pen makes fast work of cleaning up adhesive residue from a previous label. This proven solution is used by hundreds of QC/QA engineers.


